
Installation
The Phoenix CTMS is an extensive application dedicated to run on enterprise hardware to serve many users. If you however want to take a look and try it, there is an automated installation procedure for creating a local environment. The few steps below do not require any special IT skills and will result in getting an encapsulated Phoenix CTMS server up and running eg. on the desktop computer (6GB RAM, some GB free disk space and 2 CPU cores recommended).
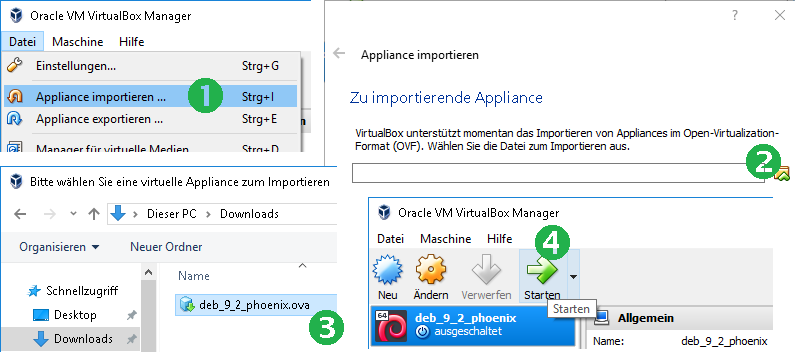
- Download and install a virtualization software package supporting .ova (Open Virtual Appliances) files. Oracle VM VirtualBox or VMware Workstation/Player are known to work and are available for various operating systems.
- Download deb_13_3_phoenix.ova. It is a vanilla Debian 13 (Linux) virtual machine image without bases packages but a bootstrap script placed to launch the Phoenix CTMS installation procedure.
- Open .ova with the virtualization software, and power on the virtual machine.
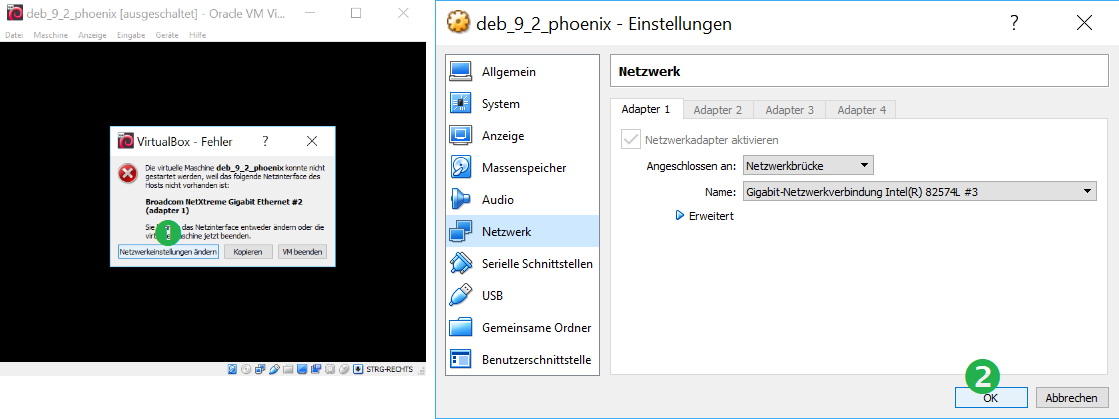
- Network connectivity is vital for installation and operation. The virtual machine uses a bridged network interface, which optains its own IP address via DHCP. When prompted regarding the unknown preset network interface, just change it to the one available on your computer, which is suggested by default.
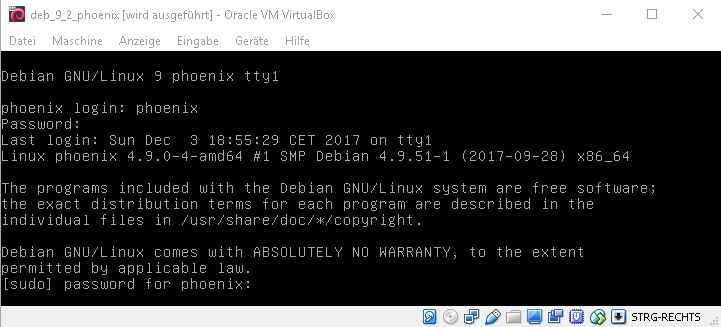
- After startup, the linux console shows the standard login promt. Login in once with username phoenix, password phoenix. The installation procedure will start immediately and therefore requires confirmation by providing the password phoenix one more time.
- The installation procedure will take around an hour to download, built and install from most recent upstream sources (Debian console can fade after some time). When finished, a default application user is provisioned and its credentials are printed to the console.
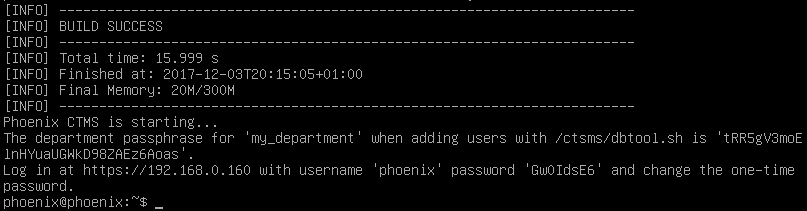
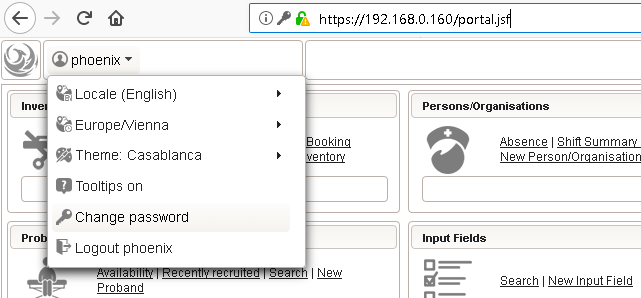
- You might want to change the provided password right after logging in using your favourite browser. Note when opening the application URL the first time, you need to allow the browser accepting the self-signed certificate. It is also required to not block pop-ups (browser tabs).
Generating Demo Data
If desired, you can populate the system with demo data by executing the command below in the linux console.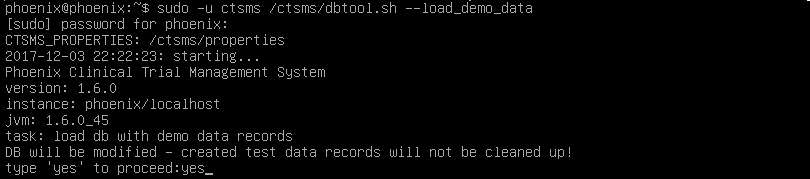
This demo data generator simulates user entries for use cases and work flows that
- qualified for test coverage during a risk assessment,
- require proof of constant response times in large volume scenarios,
- … and to provide data to play with and help you to get an idea on how the system works.
Running the generator effectively adds several departments with random names and items for each:
- Hierarchy of inventory items
- Hierarchy of staff persons with realisitc names (german) and organisations
- Application users linked to created persons/organisations
- Courses with renewal hierarchy, participation workflow simulation
- Input fields for sample inquiry forms, eCRFs and custom subject list data
- Example sketch input fields: VAS (visual analogue scale), DAS-28 (disease activity score) joint selector
- Subjects with realisitc names (german) and gender/age distribution, data entry for a diabetology sample inquiry form
- Trials: visit schedule, staff duties, inquiry forms, subject groups, subject selection and enrollment workflow simulation, custom subject list data
- eCRF with series sections and basic form scripting examples (multivariate edit checks/calculations)
- Volume test of emtpy .pdf documents, stored per inventory items, persons, organisations …
- Basic queries without any filter criteria to list all created users, inventory items, persons, organisations …
You can log in with any of the generated application users (the random username equals its password) and will see the persepecitve of that user.